Viewers will sit through bad video quality but not bad audio quality.
Your YouTube video doesn’t have to have the best-looking visuals in the world but without good audio that video is as good as nothing.
Over the last 2 years, I made more than 300 voiceovers for my YouTube channel.
During that time I was able to experiment and come up with the best ways to make my terrible voiceover audio sound more professional.
But here’s the best part.
I made all voiceovers in my bedroom without any acoustic sound treatment, with an old iPhone and later with a built-in laptop microphone, which all of us have.
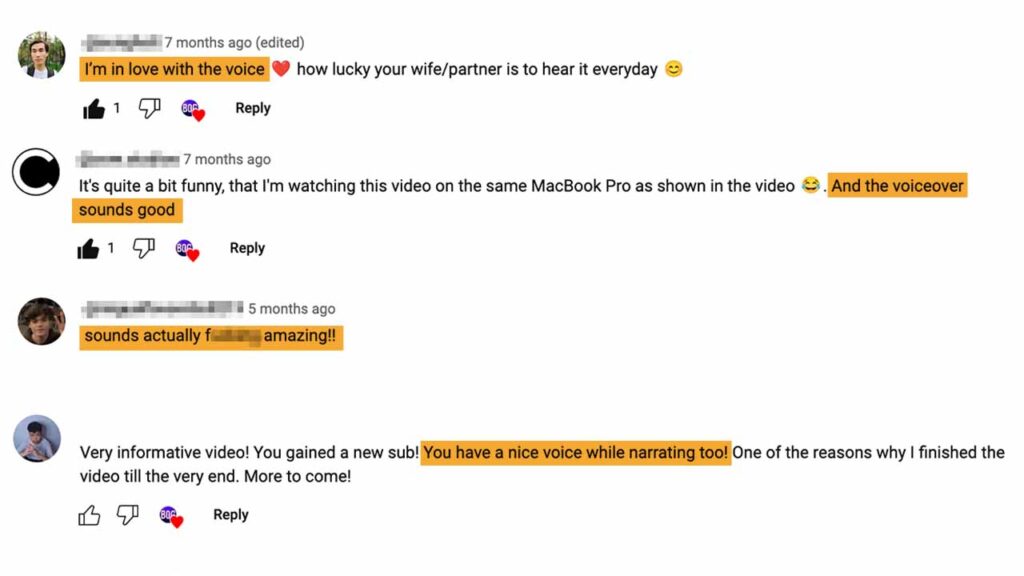
I’ve also had numerous people commenting about how good my voice sounds in my YouTube videos (I especially love the first one):
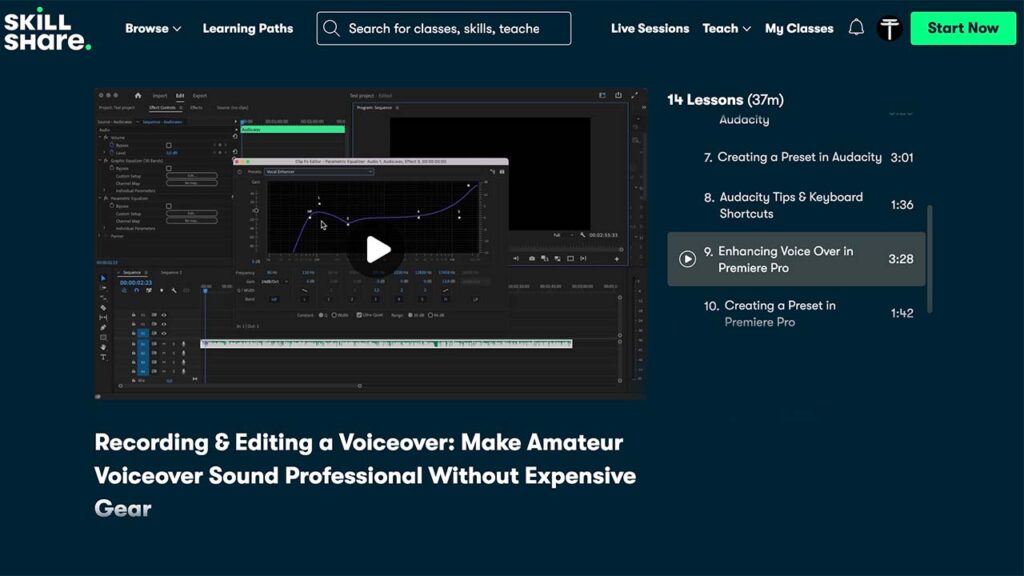
So before we get into things, I just wanted to mention that I decided to put all my learnings about recording voiceovers into a short, digestible 30-minute course.
(You can find most of what I cover in the course in the guide below but if you prefer to watch instead of read you can do so).
As a result of taking it, students will be able to record studio-quality voice-overs with just their Phones in their bedroom as well as learn to enhance their voiceovers in post-production all while saving hundreds of dollars on expensive audio gear.
I put this course on Skillshare which means that it’s free to take with a Skillshare membership. And if you don’t have it there’s a generous 30-day free trial.
You can enrol in the voiceover course here.
With all that said, here’s my guide on recording and enhancing voiceovers for YouTube videos:
How To Record A Voiceover For YouTube Videos
Before sitting down to record the voiceover there are a few crucial things to do that will save you a lot of time later on in the process:
1. Set up a quitet recording environment
The recording environment is one of the most overlooked things by beginners when it comes to recording good-quality audio.
Think about it, if I take my microphone and come out to a busy street then naturally the microphone will capture not only my voice but everything that’s going on around me.
You might say “Oh this is obvious” but what most fail to understand is that the street is an extreme example and the same logic can be applied to the room that I’m in.
If my room has a ticking clock, a buzzing refrigerator, an open window, or even a computer with loud fans it’s all going to be captured by the microphone.
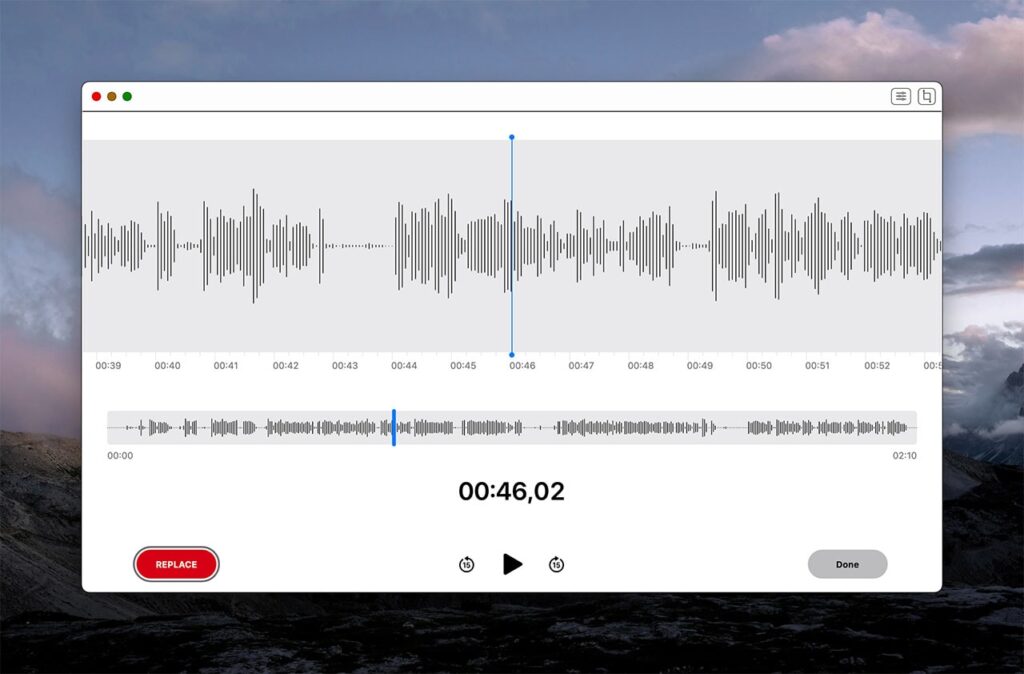
And that’s not all.
When I speak the sound travels into all directions not only into the mic.
So if there are many open spaces or flat surfaces like walls, ceilings, and floors around me, the sound waves will bounce off of those surfaces and come straight back into the microphone.
And the microphone will capture it.
I’ll get a nasty echo effect in my recording and my voice will sound distant and far away.
Here are the things you can do to achieve a great recording environment without spending hundreds of dollars on sound isolation equipment:
a) Turn off anything that makes noise
Turn off or minimize anything that produces notable noise in your recording room or move to another room if that’s not possible.
A great room to record audio in is the closet.
There are usually no clocks, computers, air conditioners, or people in the closet so it’s one of the best places in the house to achieve exceptional audio quality.
b) Avoid large open spaces
Move away from large open spaces.
These spaces produce echo which we don’t want in our voiceover recording.
c) Surround yourself with soft objects that reduce sound reverb
Examples of such objects are pillows, blankets, carpets, thick curtains, and clothes.
Another reason why the closet is one of the best places to record the voiceover is that it’s full of hanging clothes.
The surface of clothes is not flat and so it absorbs sound waves so they don’t bounce off and come back to the microphone.
This reduces echo and makes your voice sound nice and crisp.
d) Use things that isolate sound creatively
Think outside of the box.
If you don’t have a closet or your room is large and without a carpet or hanging curtains then you have to improvise.
Consider getting under the blanket or grabbing a bunch of pillows and placing them all around you.
Pulling out thick clothes and hanging them on chairs or placing them on other flat surfaces all around your room.
All of this might seem silly but trust me it makes a huge difference in audio quality.
By the way, I’ve done all of these things myself.
e) Don't overthink it too much
If your environment is good enough, adding one more pillow might just lead to diminishing returns.
If you feel that your voice sounds good enough, there’s no echo or notable background sounds then it’s not necessary to go that one step further and get into a closet or surround yourself with 7 more pillows.
2.Correctly speak to your microphone
It goes without saying that if you have your microphone behind you when you speak then the audio is not coming out nice.
So here are a few steps you can take to optimize how you speak to your microphone in order to have the best voice-over audio possible:
a) Find out the location of your microphone
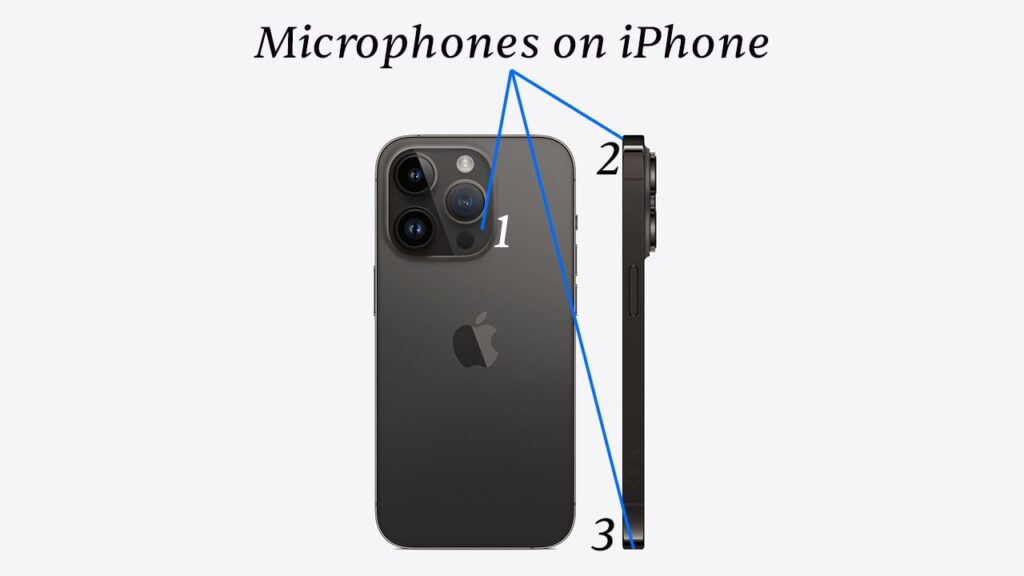
Different manufacturers place their microphones in sometimes unexpected and weird locations.
For example, I found out that my MacBook Pro houses the microphone in one of its speaker holes.
But all this time I thought it was at the top.
You can do this by Googling the mic location or turning on your voice recording software and then tapping lightly with your finger across your device.
When you see the sound waves spike, then you’ll know that your finger is close to the microphone location.
b) If you're recording into a laptop make sure its cooling fans aren't spinning
If your laptop has cooling fans spinning it will tremendously worsen your voiceover quality.
If you can’t find out how to shut them off, usually turning on the “energy saver” works and after a few seconds, the cooling fans stop spinning.
Alternatively, you can install free third-party software that lets you adjust the fan curve of your cooling fans.
c) Smile when you speak
Your viewers can sense everything, your mood, energy, and even how your day went from the tonality of your voice.
One easy fix to make your voice sound consistent and high energy across voiceover recordings is to simply smile when you speak.
d) Speak louder than necessary
If you mumble your words and even you can’t hear what you’re saying then don’t think the microphone will.
Try speaking a little louder than you do normally, accenting each letter of every word so that the listener doesn’t have to try hard to understand what you’re saying.
Make it easy for your audience to want to watch what you’ve created.
e) Take your time
Don’t rush and finish your sentences with the right intonation.
The mistake of cutting off the ends of sentences is especially evident when reading a script.
Your eyes naturally wander toward the next sentence but forget to finish the last one with the right attention that it deserves.
So make sure to keep this in mind and read every sentence fully that way your voiceover won’t seem rushed and unprofessional.
f) Repeat sentences rather than words when you mess up
It’s a lot easier to fix the audio in post when you have the whole sentence to work with rather than having to insert an individual word in the middle of another sentence.
So if you mess up during your recording it’s better to start the whole sentence over rather than starting from the word that you messed up on.
g) Speak roughly 15 centimeters away from your microphone
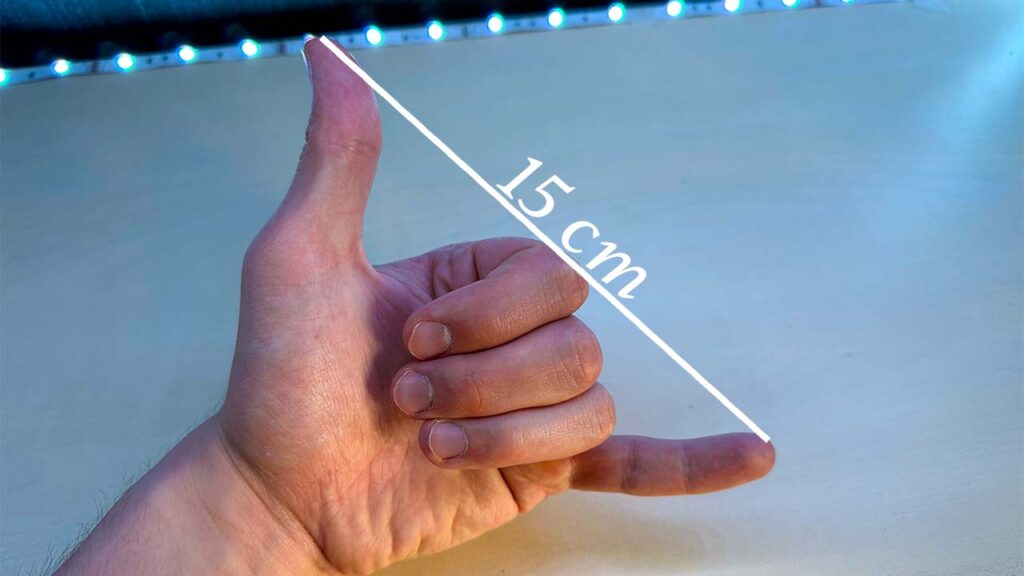
This distance can easily be measured from the end of your thumb to the end of your pinky finger.
It’s not the end all be all and every mic is different but this is just a rough, standard distance at which you should consider keeping your head away from the microphone.
Also to avoid plosives, the letters that make it seem like your microphone is exploding (for example letters P and B) you can tilt your head a little bit to the side of the mic so that it doesn’t catch the air coming out of your mouth.
That way you’ll avoid the exploding sound in your microphone if you don’t have an air filter.
How To Edit A Voiceover
Now that you’ve recorded the voiceover in an ideal environment and with the best practices for talking to the mic, you can move on to editing it.
I edit my YouTube videos in Premiere Pro so as soon as I import the voiceover into it I will do these things:
1. Cut out silences
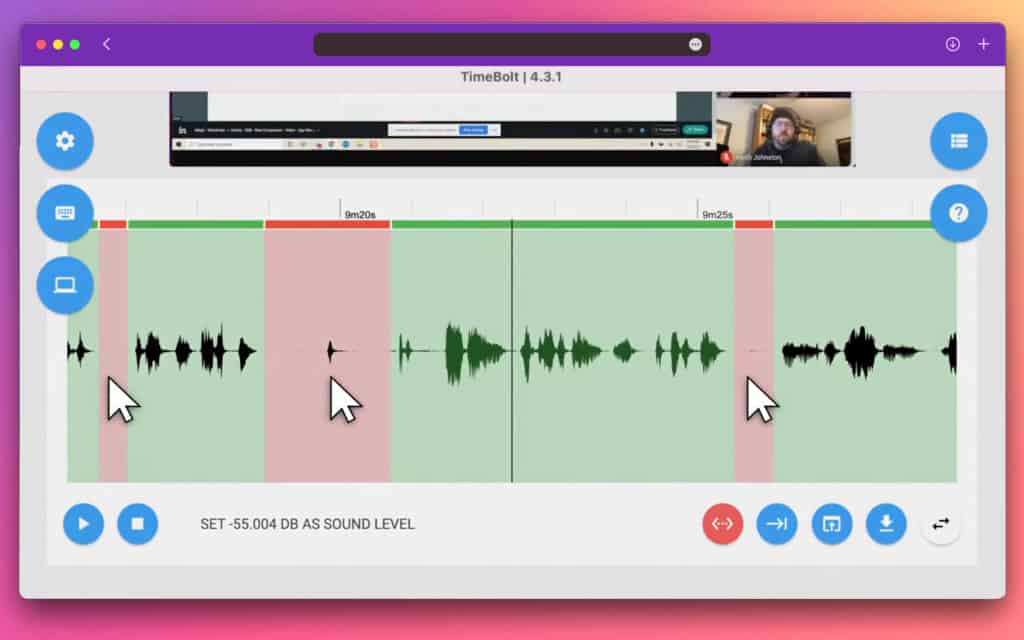
Silences, breaths, and unnecessary empty spaces in your voiceover can be the reason a viewer stops watching your video.
Viewer engagement is very important when trying to make good videos for YouTube.
Imagine that viewers are always looking for a reason to quit watching your video and don’t give them that reason.
One great tool that you can use for removing silences automatically is TimeBolt.
It uses AI to analyze your recording and removes the empty spaces for you.
2. Overlap ends of sentences
Overlapping the end of one sentence with another is a great way of removing that tiny bit of space between each sentence.
This makes your video flow continuously and reduces the chance of someone clicking off.
However, this is quite tedious and time-consuming to do so if you choose not to it’s not a big deal.
3. Use background music
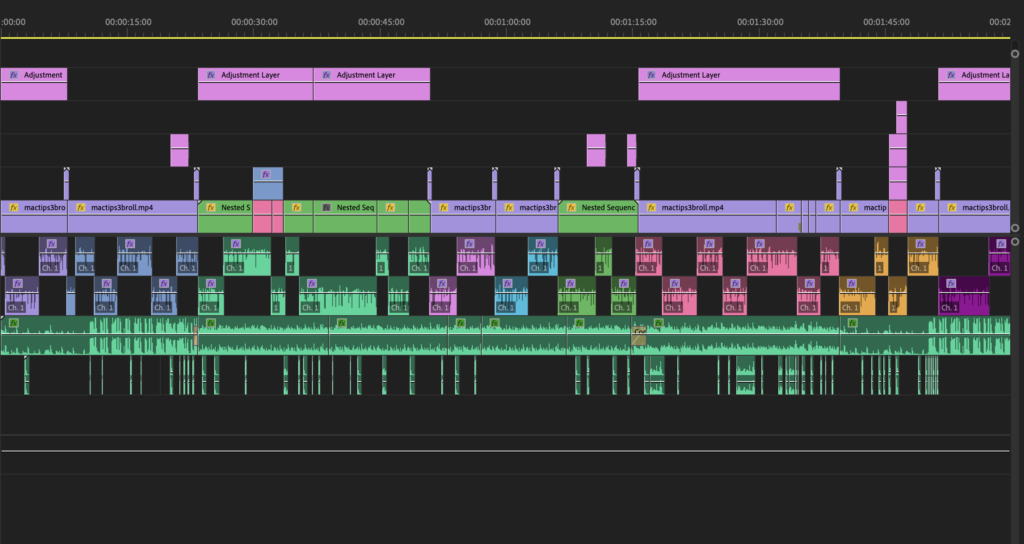
A good choice of background music can turn a 5/10 video into a 1/10 (that’s the best video score in YouTube Studio).
You can use the free YouTube Audio Library in your YouTube Studio to find royalty-free music and sound effects but the choices there are quite limited.
I recommend an Epidemic Sound subscription for the best background music library that’ll fit any YouTube niche.
But don’t just slap any song onto a video and call it a day.
Make sure it matches the tone, the pacing, and the mood of your video.
Also, don’t be afraid to change music tracks differently.
Just like a book, a video has many chapters each with its own tonality.
So pick the background music accordingly.
It can truly make or break your video.
Also, you can read my Epidemic Sound review here.
How To Enhance Voiceover Audio
I use free software available for Mac and Windows called Audacity to enhance my voiceover audio quality.
I do this before I import the voiceover into my editing software.
There are 3 effects I apply to every single voiceover that I create.
These effects will make your voiceover sound a lot, a lot better.
1. Noise reduction
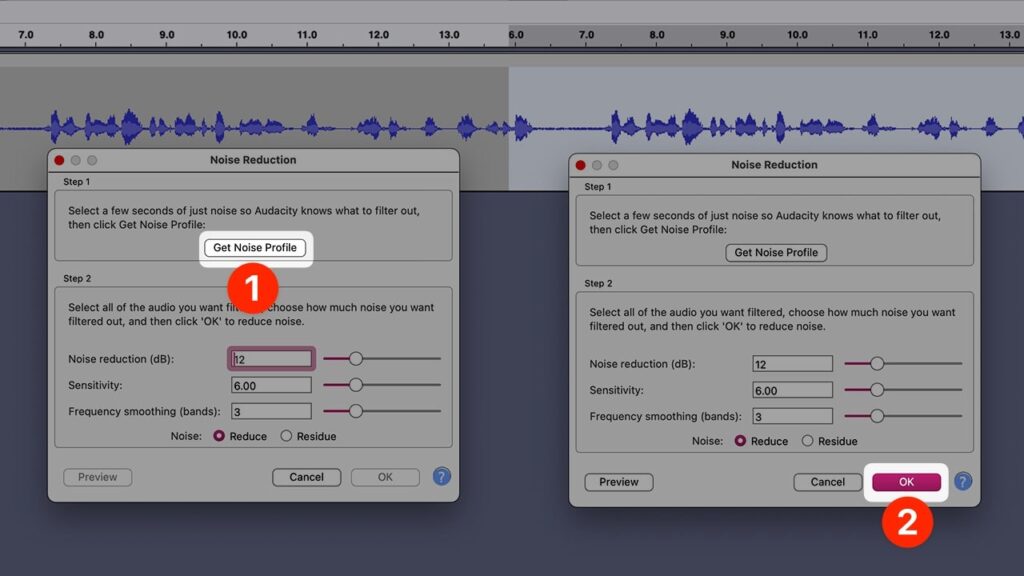
Noise reduction is a process that gets rid of background noise in your audio.
If you haven’t set up your environment correctly your microphone will pick up background noise, like hissing or buzzing that you might want to remove.
Here’s how to reduce noise in Audacity:
- Find a space in your clip where you’re not talking (it’s a good idea to be quiet for 5 seconds as soon as you start your recording so that you know that the quiet place is always in the beginning).
- In Audacity you can scroll through your audio clip by holding shift and scrolling. And you can zoom in by holding the control key and scrolling (command on Mac). Use this to find a quiet place for at least 3 seconds.
- Once you find a space where there’s only background noise, select only that area (click and drag to select), go to effect -> noise reduction -> and get noise profile.
- Then I double-click on the whole clip to select all of it, go back to effect -> noise reduction, and click okay.
This will reduce the background noise in your audio clip.
2. Compressor
The compressor reduces the audio’s dynamic range – that is, it reduces the difference in level between the loudest and quietest parts of the audio.
It makes it so the quietest parts are louder and the loudest parts quieter.
This makes the audio sound a lot more professional and even throughout the recording.
To apply the compressor in Audacity double-click on your audio clip to select it all -> go to effect -> compressor.
These are the settings that I use but the default ones work just as fine:
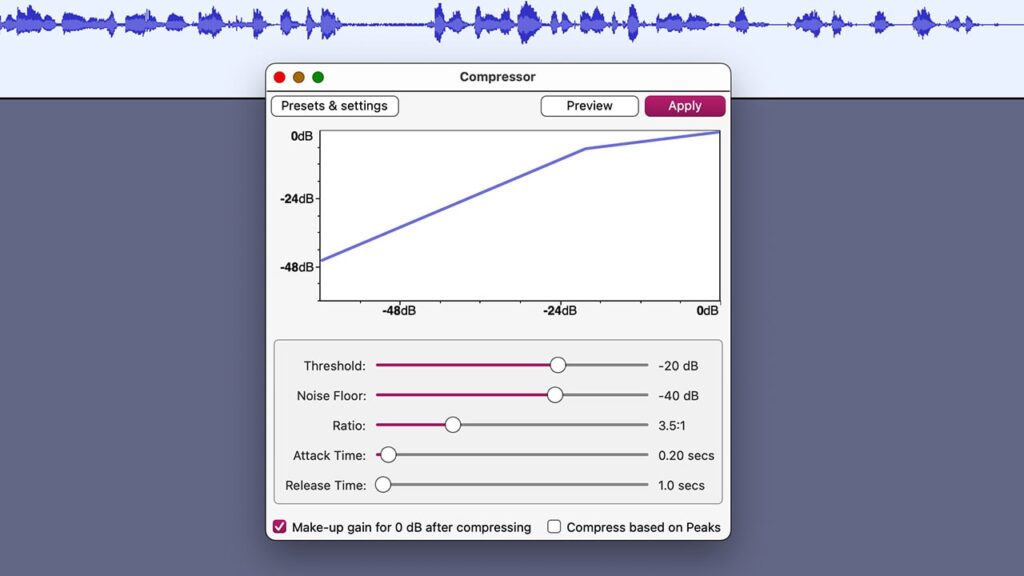
With the compressor applied I move over to the final edit.
3. Normalization
Audio normalization changes its overall volume by a fixed amount to reach a target level.
So it just makes your audio quieter or louder based on a certain standard, which usually is -1db.
To normalize the audio in Audacity double click on the clip to select it -> effect -> normalize -> and okay.
By the way, if you change any of the settings of any of the effects you can go back to factory presets by clicking manage -> factory presets -> defaults.
It will bring back the default settings for each effect if you want to go back to how it was before.
Best Gear For YouTube Voiceovers
If you’re just starting your YouTube channel I’d recommend not buying any gear.
You can easily make videos with just your phone and computer which are things that you probably already have.
I recommend checking out my guides on how to make a YouTube video for free as well as what great you need to start a channel (spoiler: you already have all the necessary gear that you’ll need).
But nevertheless, here are the best apps and microphones for recording voiceovers for YouTube videos.
1. Budet microphone - Blue Yetti
The best budget microphone is your phone. You can use the Voice Memos app on your iPhone or any voice recording app on your Android phone to achieve above-average audio recordings.
However, if you want to upgrade to a stand-alone mic then the Blue Yeti USB Microphone is a great budget option.
2. Flagship microphone - Shure SM7B
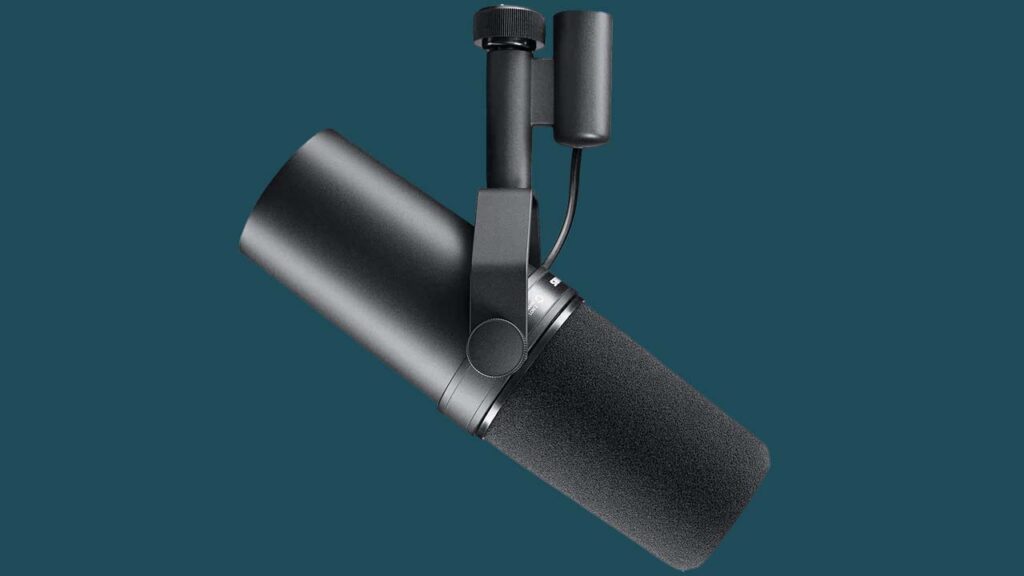
And if you want to take your audio quality to the next level the best industry microphone most widely used across YouTube is the Shure SM7B.
It’s the one Joe Rogan and most popular YouTubers use to record their voiceovers.
The sound you get from this microphone is crisp, has plenty of bass, and resembles a studio-quality recording.
3. Recording Software - Audacity & Voice Memos
If you’re using your iPhone or a Mac to record your voiceover, then the built-in Apple Voice Memos app is great.
I record all of my voiceovers for my YouTube videos within the Voice Memos app.
Alternatively, you can use a free software called Audacity to record and enhance your voiceovers.
It’s the best free audio editing software that is as powerful as it is easy to use.
If you’re using DaVinci Resolve or Premiere Pro to edit your videos, you can record your voiceover directly into the editing software without having to use any third-party apps.
Was this YouTube voiceover guide useful?
There you have it.
My YouTube voiceover guide.
All in all, to make a professional-sounding voiceover for a YouTube video record it in a quiet environment that absorbs sound such as a closet, speaks loud, clear, and through a smile, enhance your audio in your editing software, edit out breaths, pauses and imperfections.
If you want to learn more about making voiceovers sound professional consider checking out my 30-minute crash course about how to make amateur voiceovers sound professional without expensive gear.
With that said, I will leave you with some resources to help you grow your YouTube channel:
- How To Write YouTube Titles Viewers Can’t Resist
- How To Grow A Faceless YouTube Channel – Notion Template
- 9 Best AI Tools For YouTubers (Make Videos 67.1% Faster With AI)
Thanks for reading 👋.
